 ReagentFlow
Recipes
A recipe lists the components used up to make one unit of a finished or sub-assembly SKU. The Recipes page lists every SKU that can have a recipe; you edit the lines on the SKU’s detail page. Description on screen: Components consumed per finished or sub-assembly unit. Produce uses unheld remaining; edit lines on the SKU.
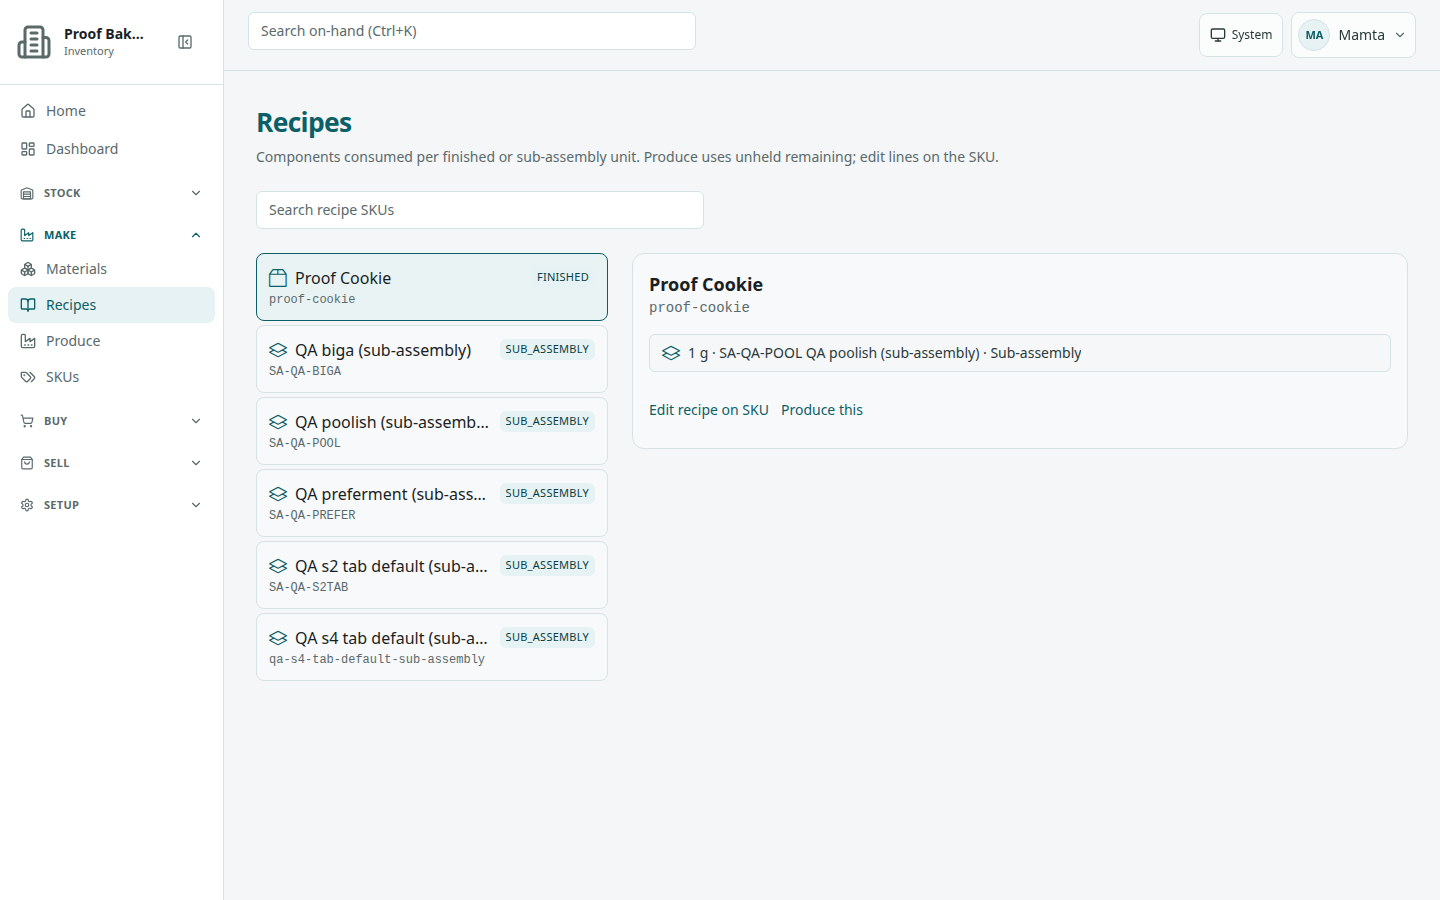
/recipes) with a finished SKU selected.Browse recipes
- Open Make → Recipes.
- Optional: filter with Search recipe SKUs.
- Choose a SKU in the list. An Instant badge marks instant recipes.
- The panel shows the code, Build time [time] when set, and each component line with its quantity and kind. Lines flagged Do not include in resulting SKU say so.
- Choose Edit recipe on SKU (or Add recipe on SKU when there are no lines; Open SKU for readers). With a recipe and a producing role, Produce this opens Make → Produce for that SKU.
Empty states: No recipe SKUs / Create a finished or sub-assembly SKU, then add recipe lines on its detail page.; Select a recipe SKU / Component lines and quantities per unit show here.; No recipe / An inventory clerk can add recipe lines on the SKU.
Edit a recipe on the SKU
On a finished or sub-assembly SKU’s detail page, the Recipe section says Components consumed per unit — raw, sub-assembly, or finished. Package counts come from the server.
- Optional: tick Instant (produce at sale) — Restaurant / food-truck: if the shelf is short, components are consumed when this item sells. Batch produce still uses the Produce page. See instant sales.
- Optional: set Build time with Hours and Minutes (Optional. How long this recipe takes to build. This does not schedule production.). Clear build time empties both.
- For each component, pick it in Select SKU… (raw, sub-assembly, or finished SKUs, shown with kind and unit) and enter the quantity per unit. Remove deletes a line; Add component line adds one.
- Optional: tick Do not include in resulting SKU on a line to leave that line (and anything under it) out of the SKU’s rolled-up materials, its ingredient list, and its calculated calories. The component is still used up when you produce.
- Choose Save recipe (it reads Saving recipe…). Success: Recipe saved.
People who cannot edit and have no lines see No recipe / An inventory clerk can add recipe lines.
Can make and produce
When a warehouse or storefront is known, the page shows Can make a quantity at the facility code. Without one: No warehouse or storefront is available to compute can-make. While looking up: Looking up a facility to compute can-make…
Produce units has Quantity, Lot number (optional) (placeholder Posted released — lots created here start released), and Location (empty: No bins). Choose Produce (it reads Producing…). Success: Produced [count] unit(s).
The Produce page (Make → Produce) also accepts scanned item codes for the components, including codes built from the company’s serial template.
Print labels for produced items
Below the recipe, On-hand item labels lists packages of this SKU to label, with Print and Print all [n] (see Finished SKU labels). Empty: No on-hand packages for this SKU yet. Produce a unit, then print each item here.
Labels for produced items follow the SKU’s saved Item labels settings:
- With Label each item on, you print one label per produced unit. With it off, you print one label for the run (the first unit). Produce makes the same number of units either way.
- With Print a serial label off, the item code is left off the label. The units still get their item codes.
On the Produce page (Make → Produce), a line above the button states the setting, for example Item labels: one label for each unit. or Item labels: one label for the batch, not each unit. (with The item code is left off the label. when the serial label is off), and links to SKU item labels. After a run, a print queue appears titled Print each produced item or Print one produced item.
Produced lots then appear on Lots. Hold/release is a separate job; produce does not leave them held.