 ReagentFlow
Shipping
Page title Shipping. Description on screen: Ship a package onto a carrier, then receive it at the destination. When inventory returns a ready postage raster we print that on the B4. A local address label is only used if the API is missing or not ready.
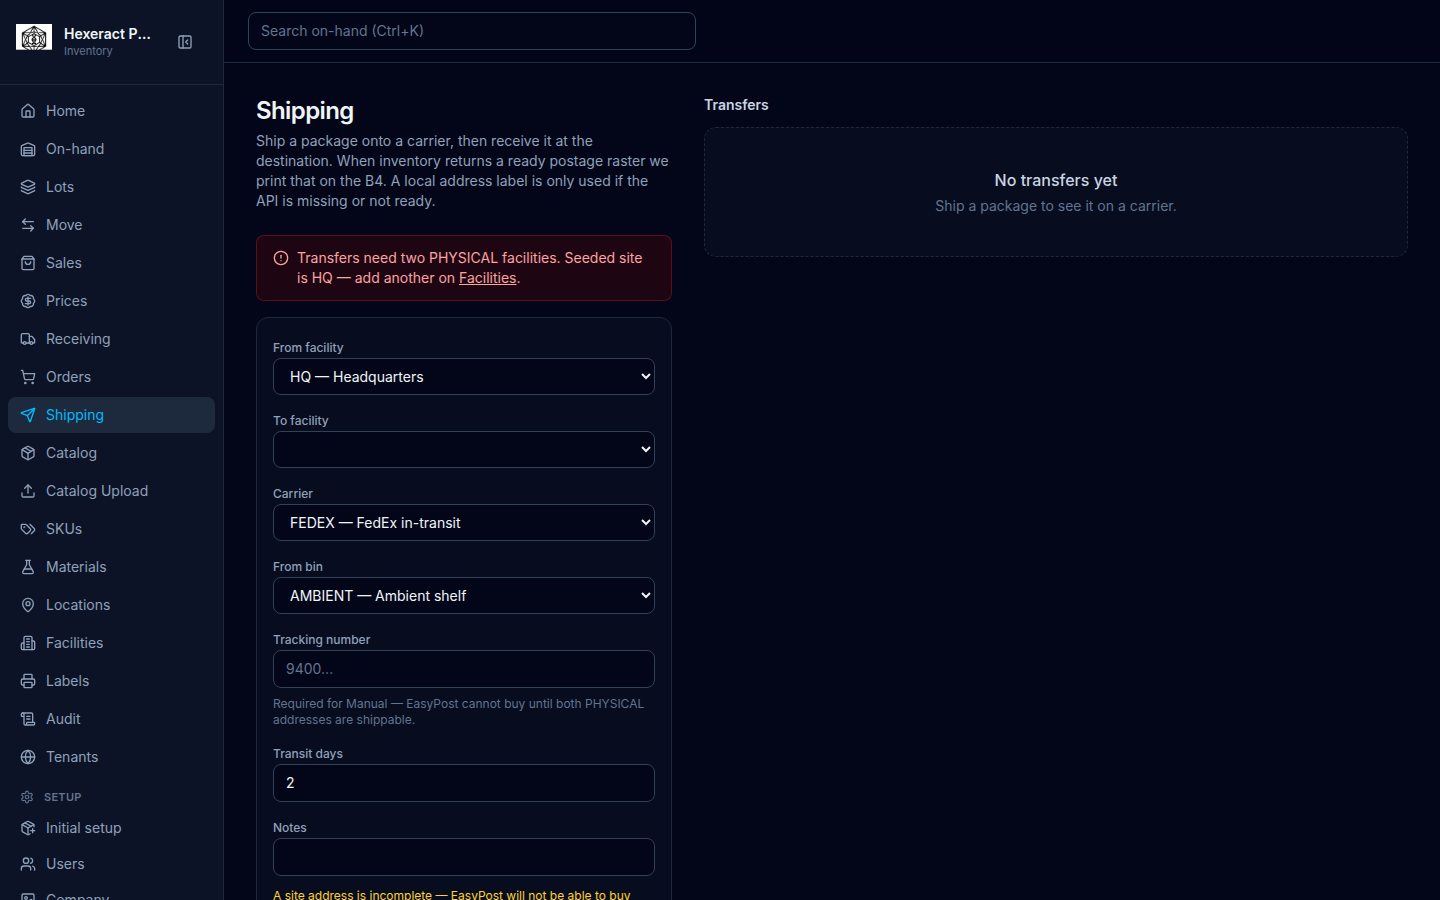
Ship a package
If the company has fewer than two warehouse or storefront sites: Transfers need two PHYSICAL or STOREFRONT facilities. Operated site is [code] ([name]) — add another on Facilities. With no site at all the second sentence is Add them on Facilities.
- Fill From facility, To facility, Carrier, and From bin.
- Add Lines (from on-hand at the origin bin): scan a package into Scan package (placeholder Scan to add a line from the origin bin), choose one of the on-hand buttons, or pick Select on-hand… and a quantity. Add line appends another row. Scanning a package in another bin switches From bin to that bin; if it is not on hand there: [code] is not on-hand at the origin bin. Pick the from-bin and scan again.
- Set Transit days and optional Notes.
- Tracking: when both origin and destination addresses are shippable, the field is Tracking number (optional) with placeholder Leave blank if EasyPost can buy and hint Optional when EasyPost can buy. Required for a Manual tracking number. Otherwise it is required Tracking number with hint Required for Manual — EasyPost cannot buy until both PHYSICAL addresses are shippable.
- Choose Ship package (or Shipping…).
Live carrier purchase is not required to use this screen. You can always type a manual tracking number and still print a label (API raster when inventory has one, otherwise a local address label on the B4).
Empty transfers: No transfers yet / Ship a package to see it on a carrier.
Receive, lost, damaged
Select a transfer. In-transit packages can Receive into a bin with Receive package. Exceptions: Mark package lost arms Confirm lost / Cancel. Damage uses Good / Split / Damaged then Record damage.
Postage label on the B4
Heading Postage label. While fetching: Asking inventory for a raster… When inventory has a ready raster: Label from API (media and template names when present) . Print it on the B4 — no local fallback.
Connect a printer with Printer model (this page offers B4 — mailing (104 mm)), then Connect USB-C or Connect Bluetooth. Print with Print API label when a raster is ready, or Print address label for the local fallback. While printing: Printing…
Fine print on the page: API raster is B4 4×6 at 203 dpi (832×1248). Local address fallback is only used when inventory has no ready raster. Success notes include API raster sent to B4. and Local address label sent to B4.
Item labels (separate sidebar item)
Sidebar: Stock → Labels (/labels). Roles: ADMIN INVENTORY_CLERK RECEIVING SALES. Description on screen: Print to a NIIMBOT on this desk over USB-C or Bluetooth. Shipping postage is on the Shipping page. Item layouts (SKU / lot / qty) come from inventory.
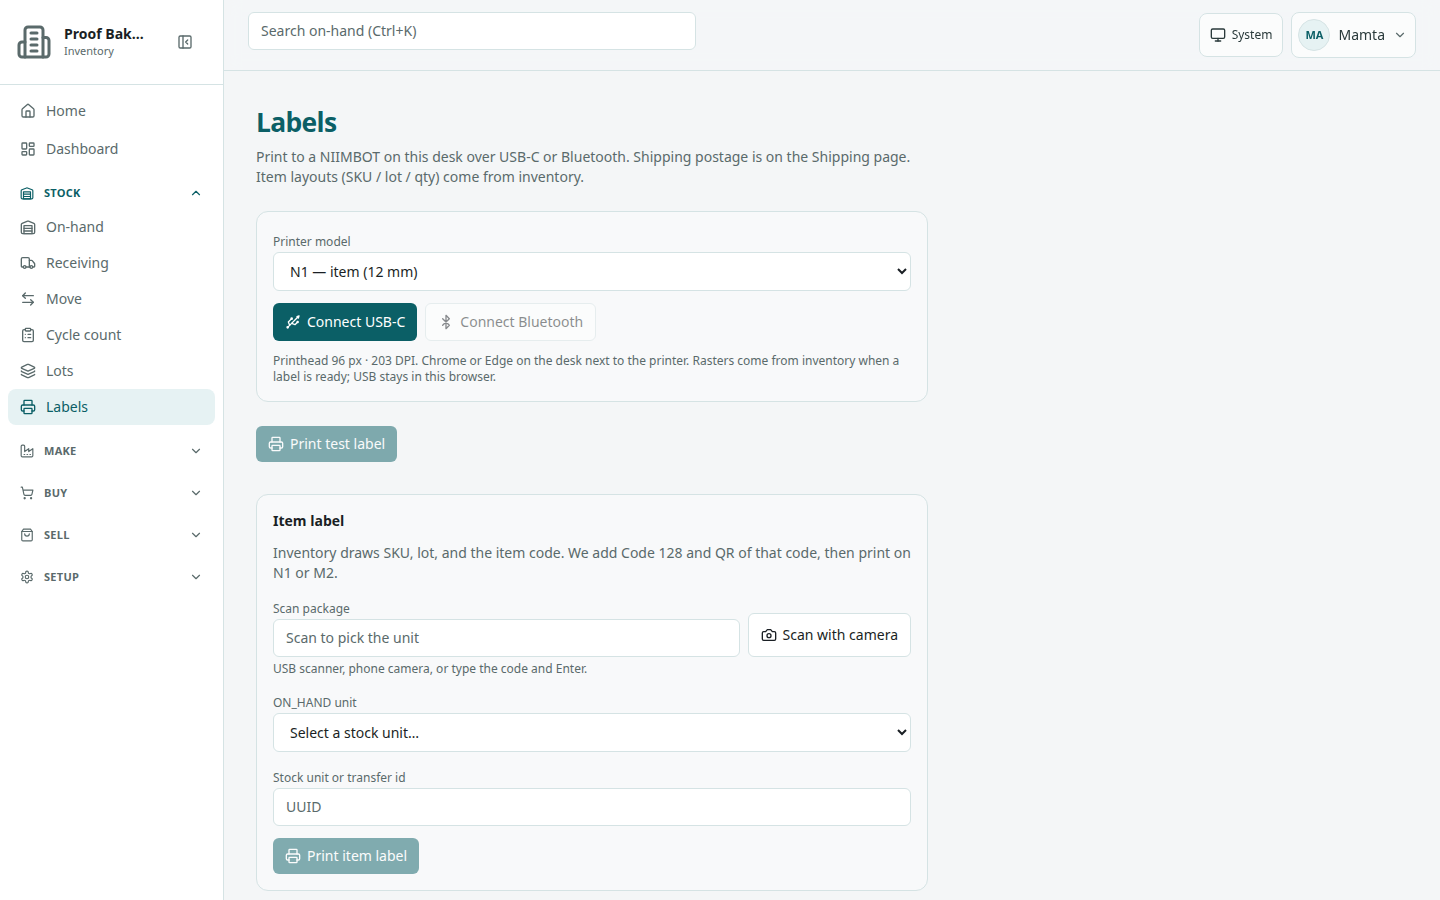
Connect the printer
- Open Labels.
- Set Printer model: N1 — item (12 mm), M2 — 48 mm, M2_H — 48 mm, or B4 — mailing (104 mm).
- Choose Connect USB-C or Connect Bluetooth. Disconnect ends the session.
- Optional: Print test label.
Print one item label
Section Item label: Inventory draws SKU, lot, and the item code. We add Code 128 and QR of that code, then print on N1 or M2.
- Scan the package into Scan package (placeholder Scan to pick the unit), or choose it in ON_HAND unit (Select a stock unit…), or paste an id into Stock unit or transfer id (placeholder UUID).
- Wait for Asking inventory for an item raster… to finish. A preview appears with Item raster from API.
- On an M2, optionally tick M2 multi-pass (identity then wrap).
- Choose Print item label (it reads Printing…).
With a B4 selected: Switch the printer model to N1 or M2 to print item labels. When the SKU has an ingredient statement, it shows under the preview (see Materials).
Label every item of a finished SKU
Section Finished SKU labels: Label each on-hand item of a finished or sub-assembly SKU, or one label for the batch when that SKU is set that way. Raw receiving is a different screen.
- Choose the SKU in Finished SKU (Select a finished SKU…).
- Read the queue heading: Print each item label (one per item) or Print one item label (one for the batch). The SKU’s item label settings decide which.
- Choose Print on a package, or Print all [n].
Queue descriptions: One label per item. Codes are Code 128 plus QR of the same string. Connect a NIIMBOT N1 or M2., This SKU prints a single item label for the batch. Turn on Label each item to print every unit., or, when the SKU leaves the code off, One label per item. The item code is left off this print. or One label for the batch. The item code is left off this print. Empty: No on-hand packages for this SKU.
The same print queue also appears after receiving (see Receiving) and after producing (see Recipes).